
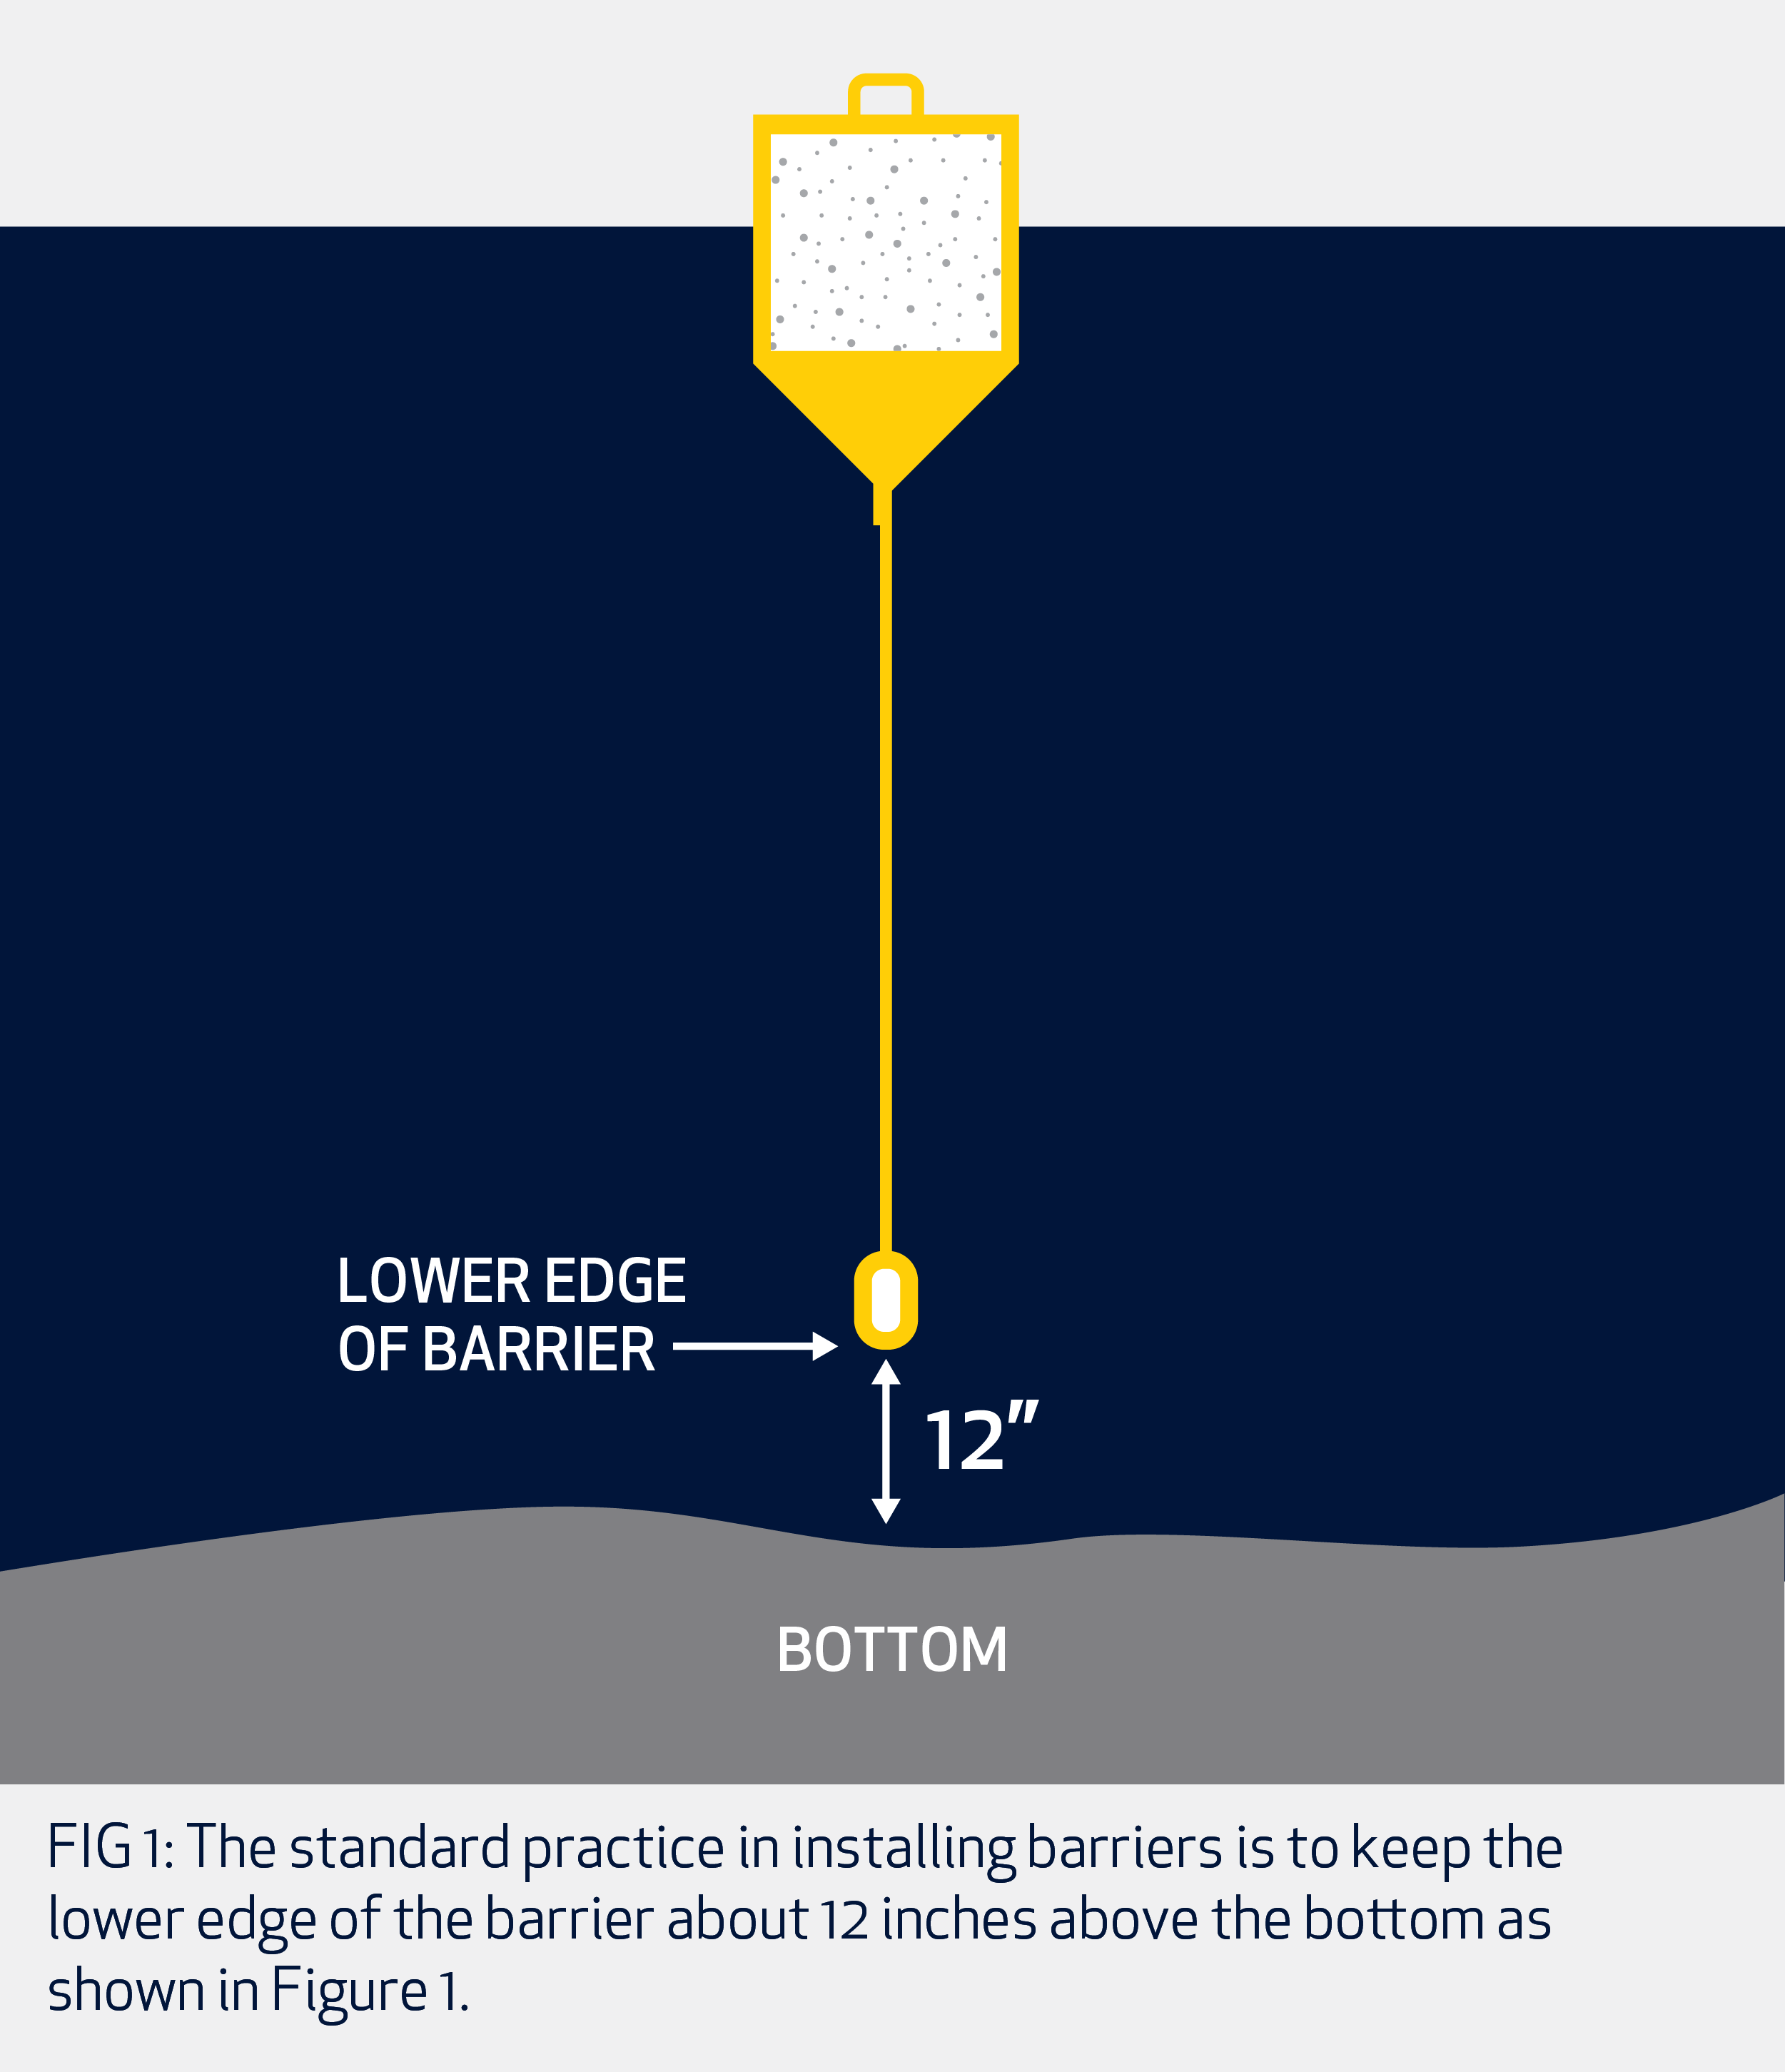
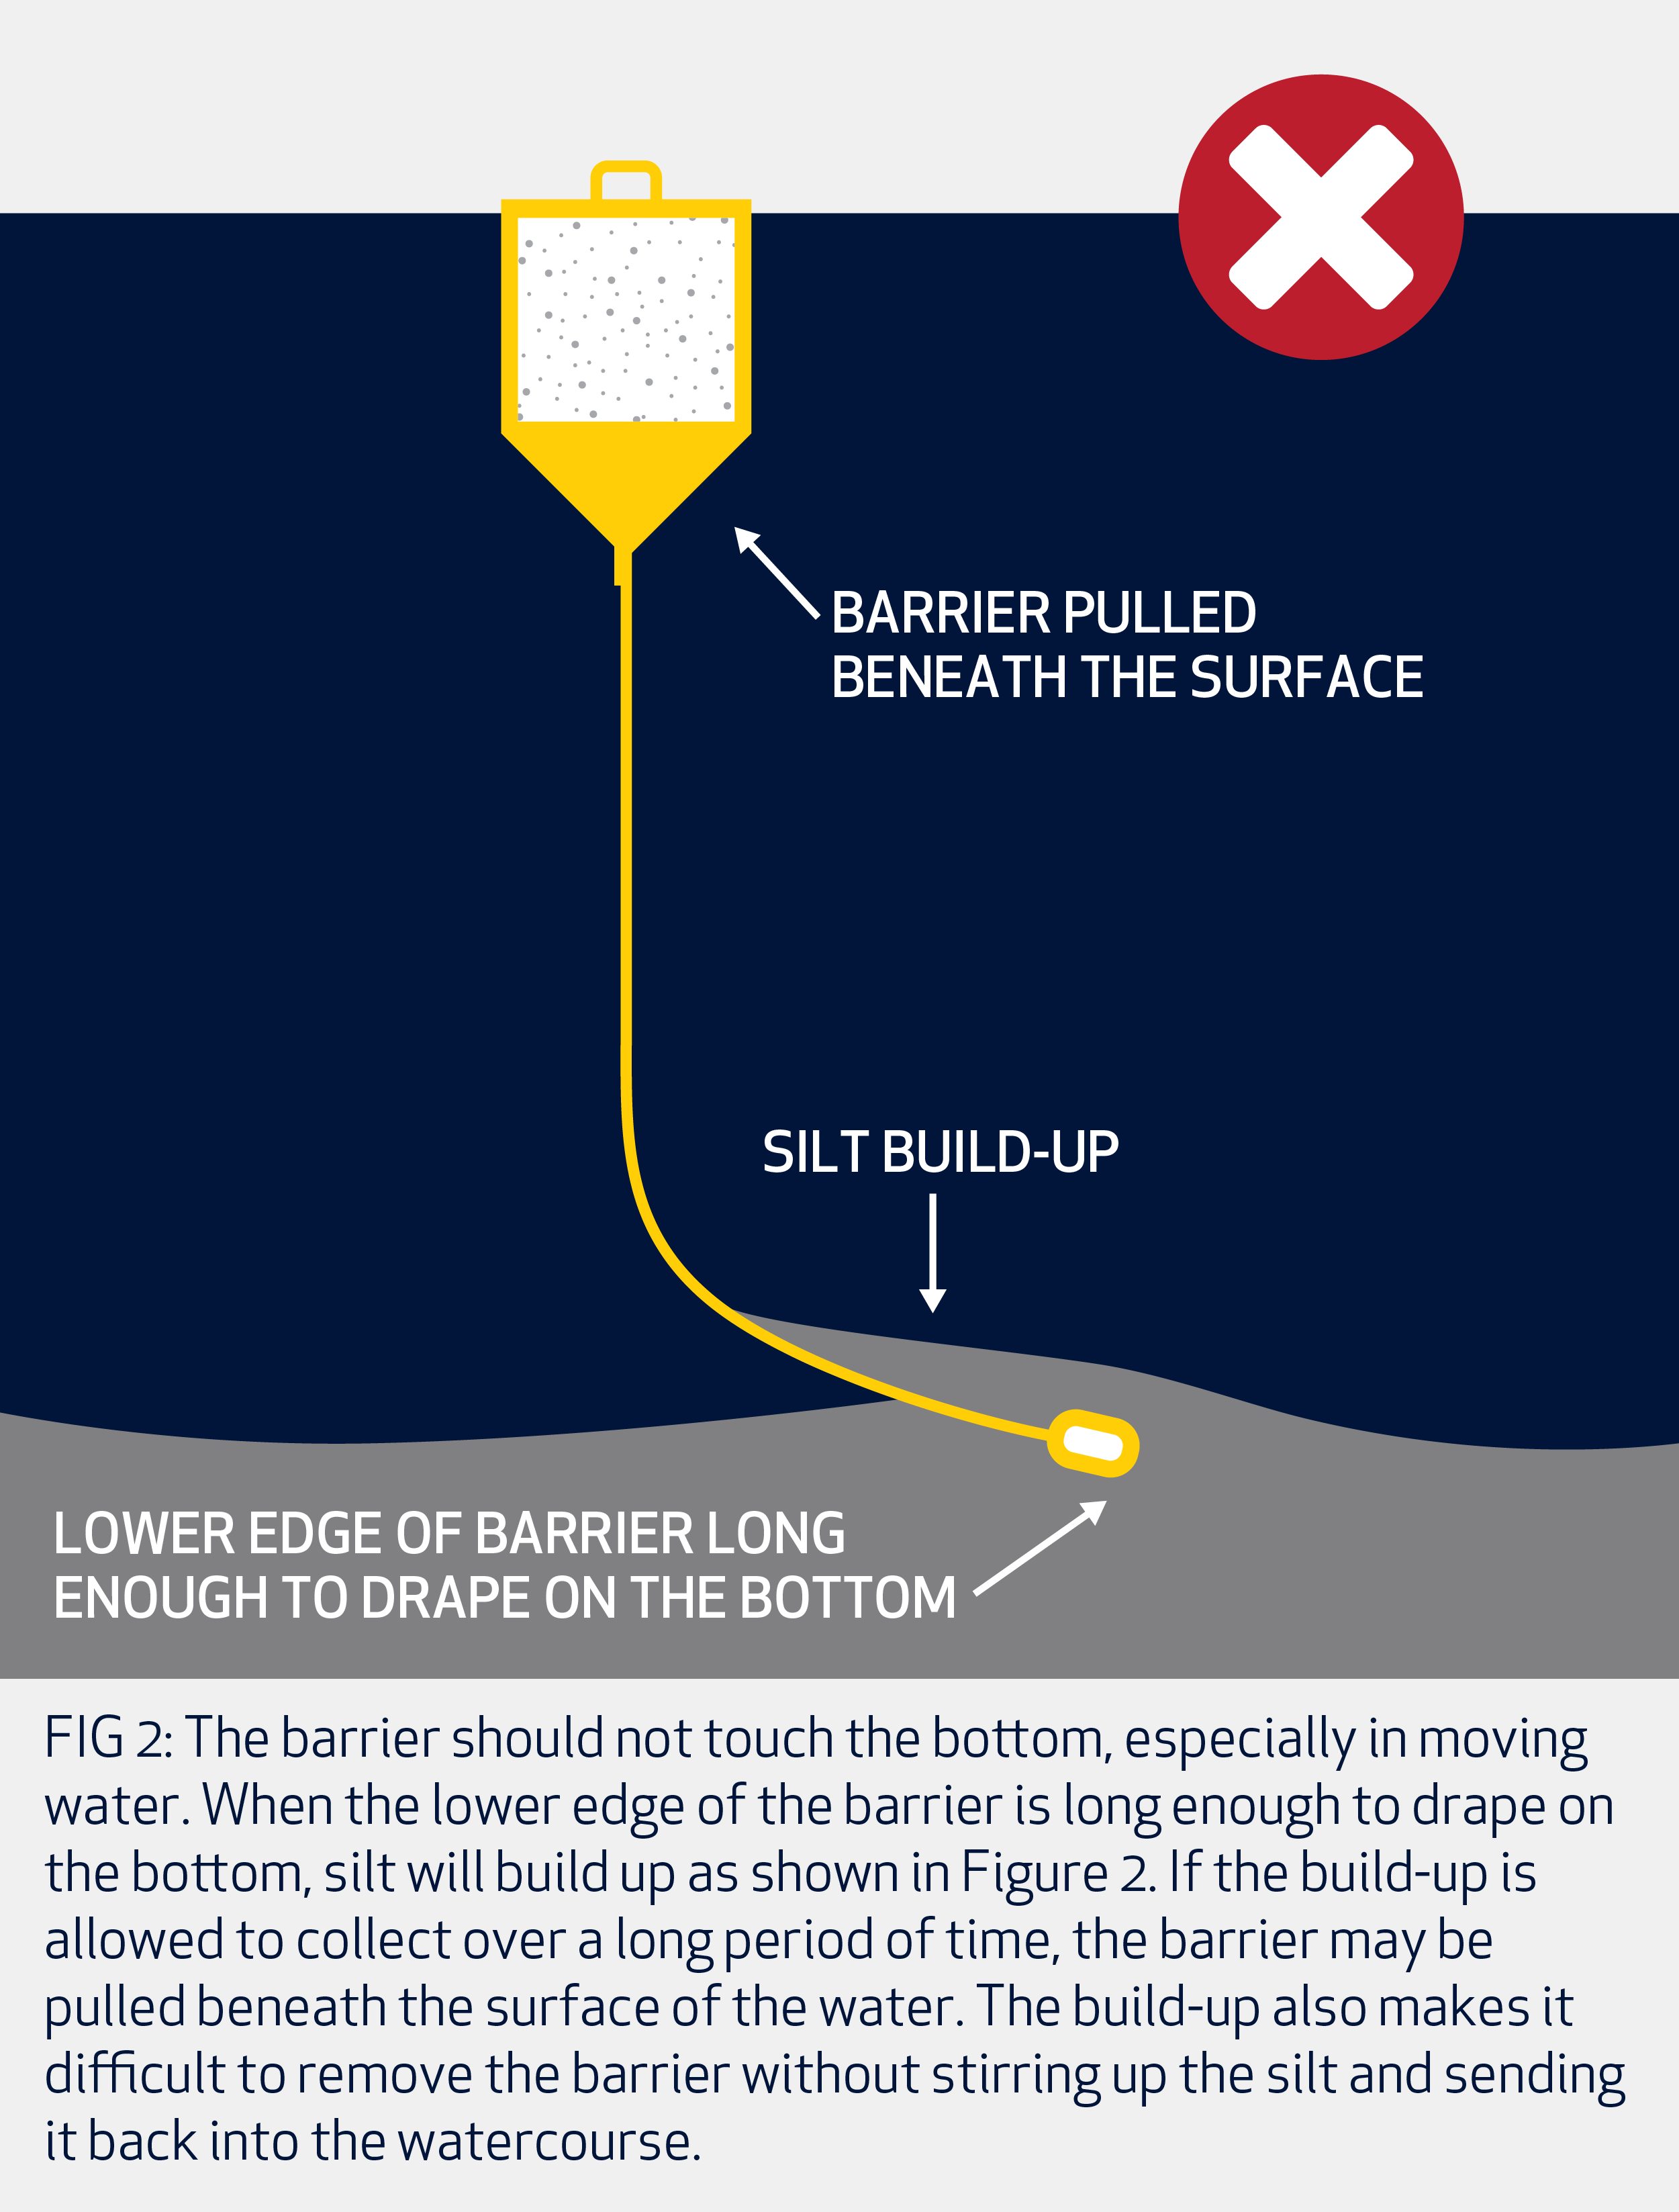
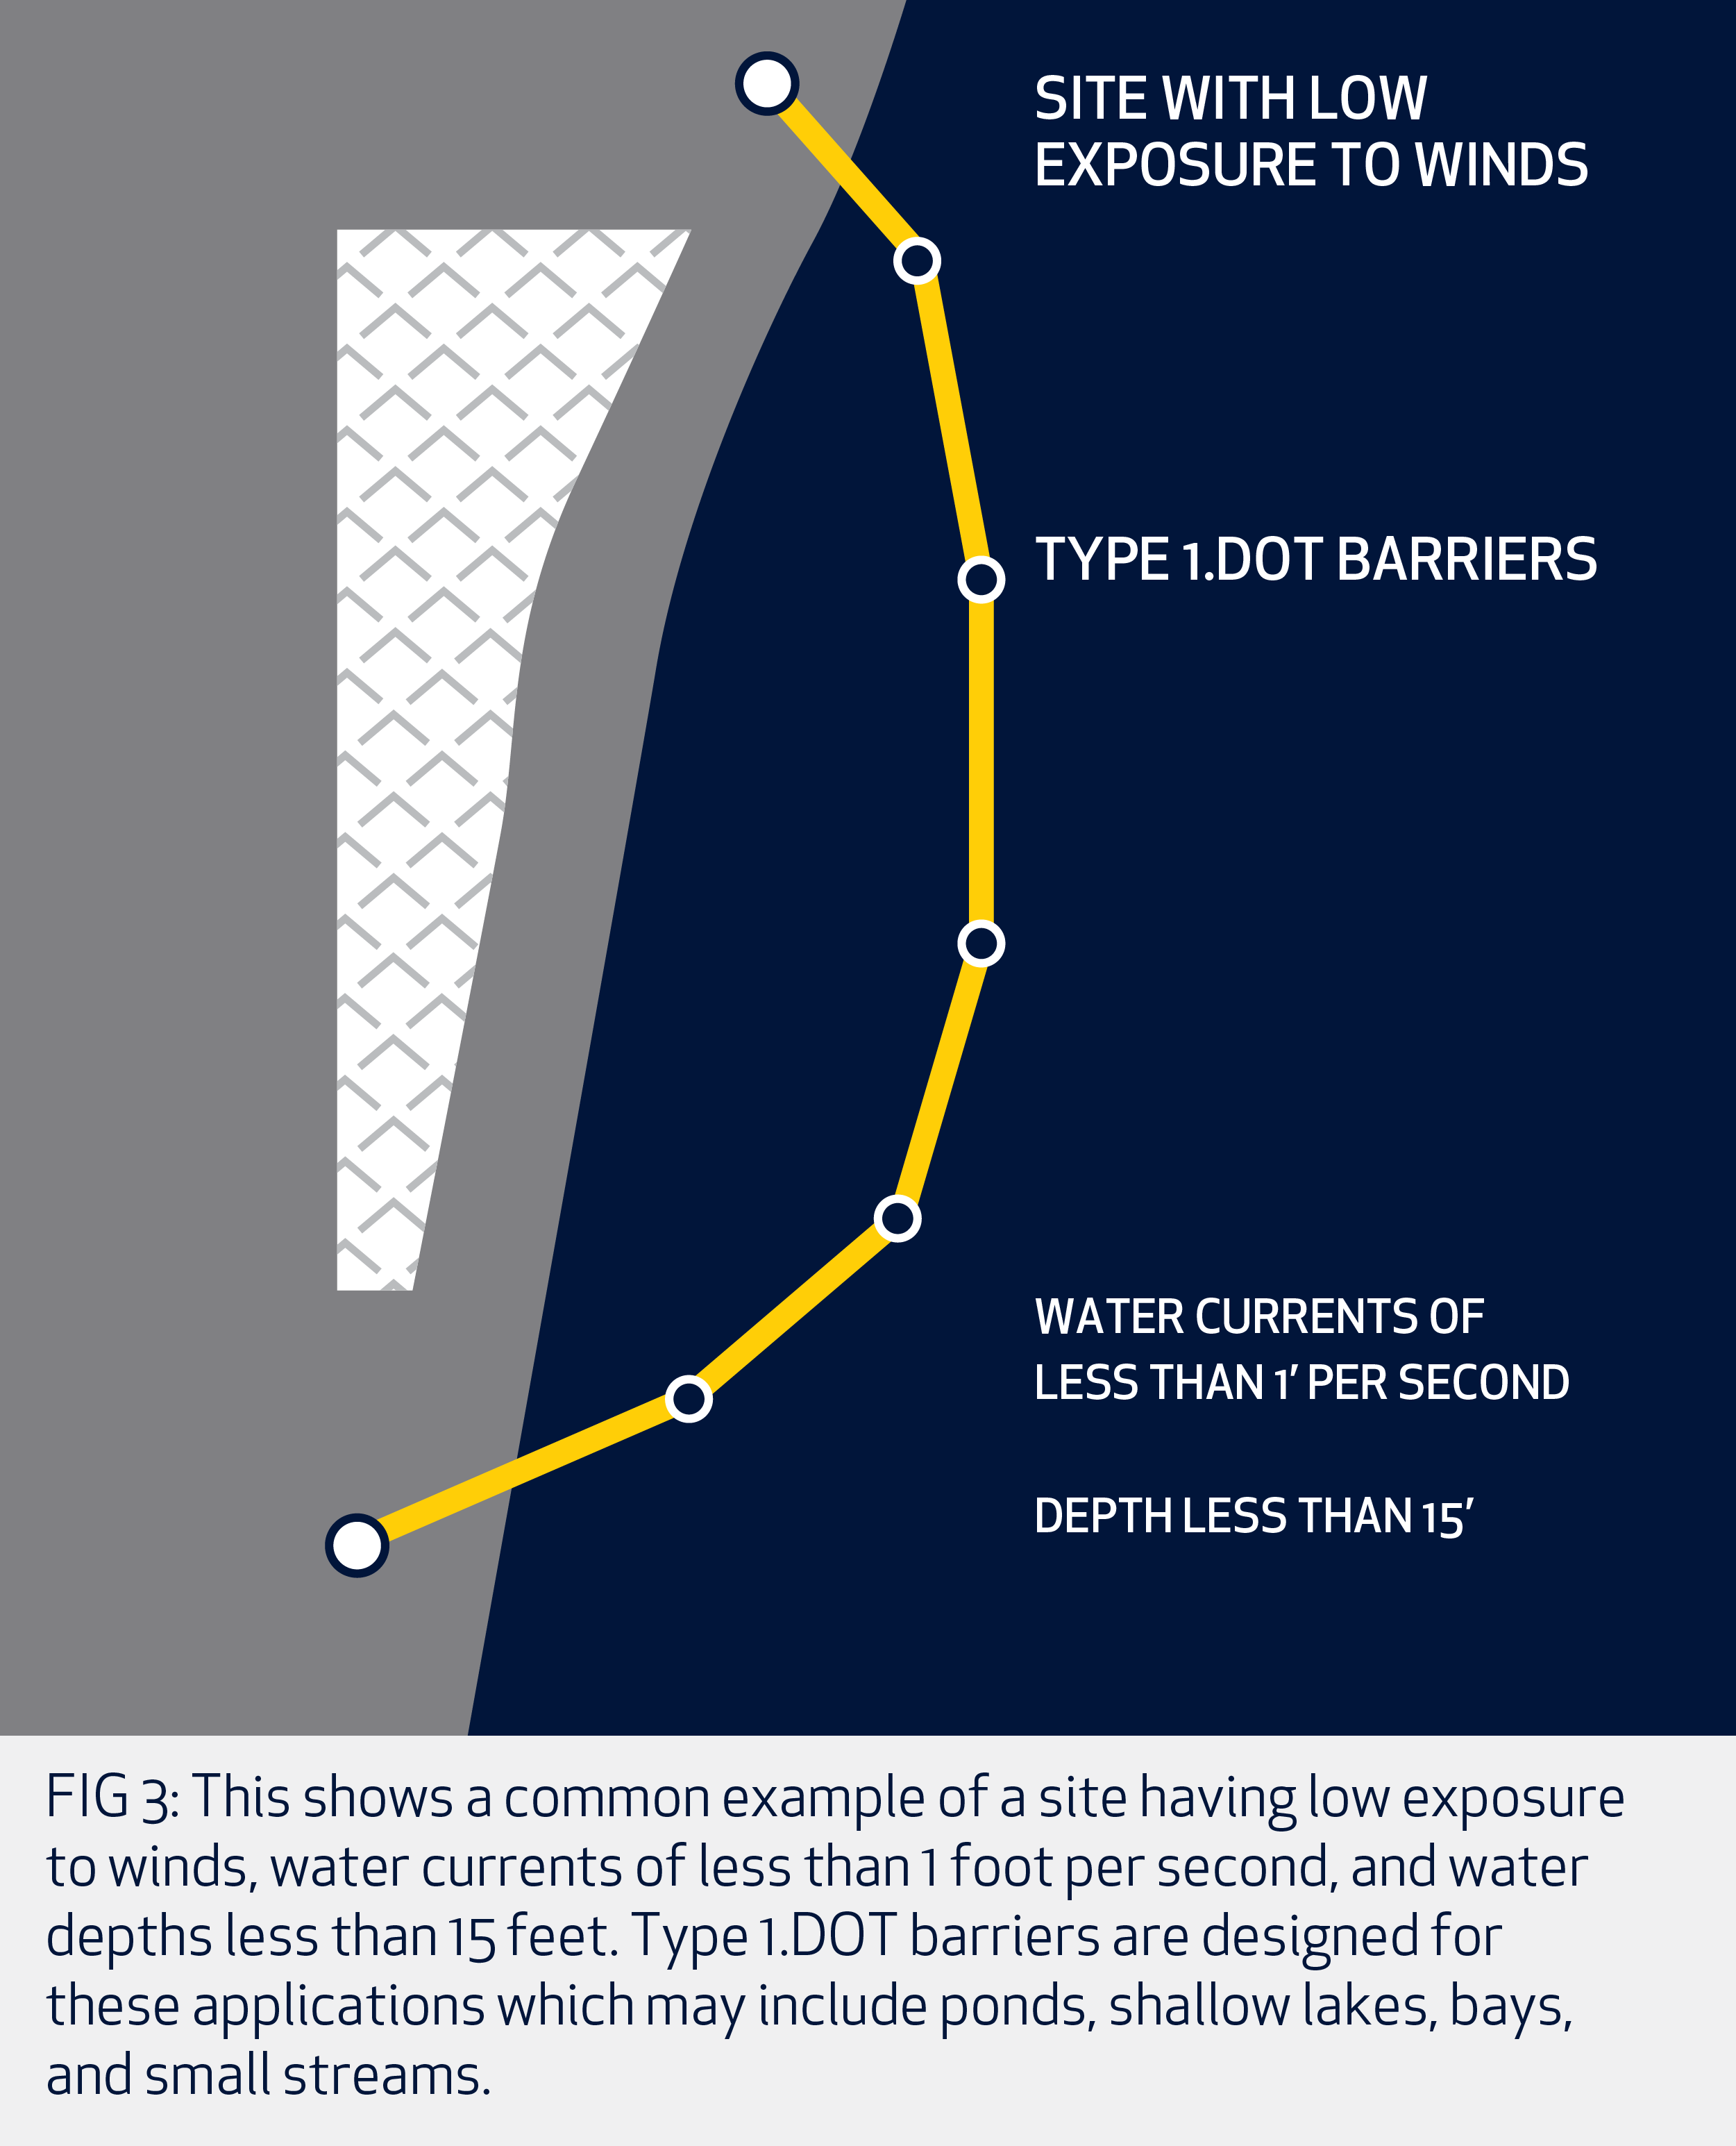
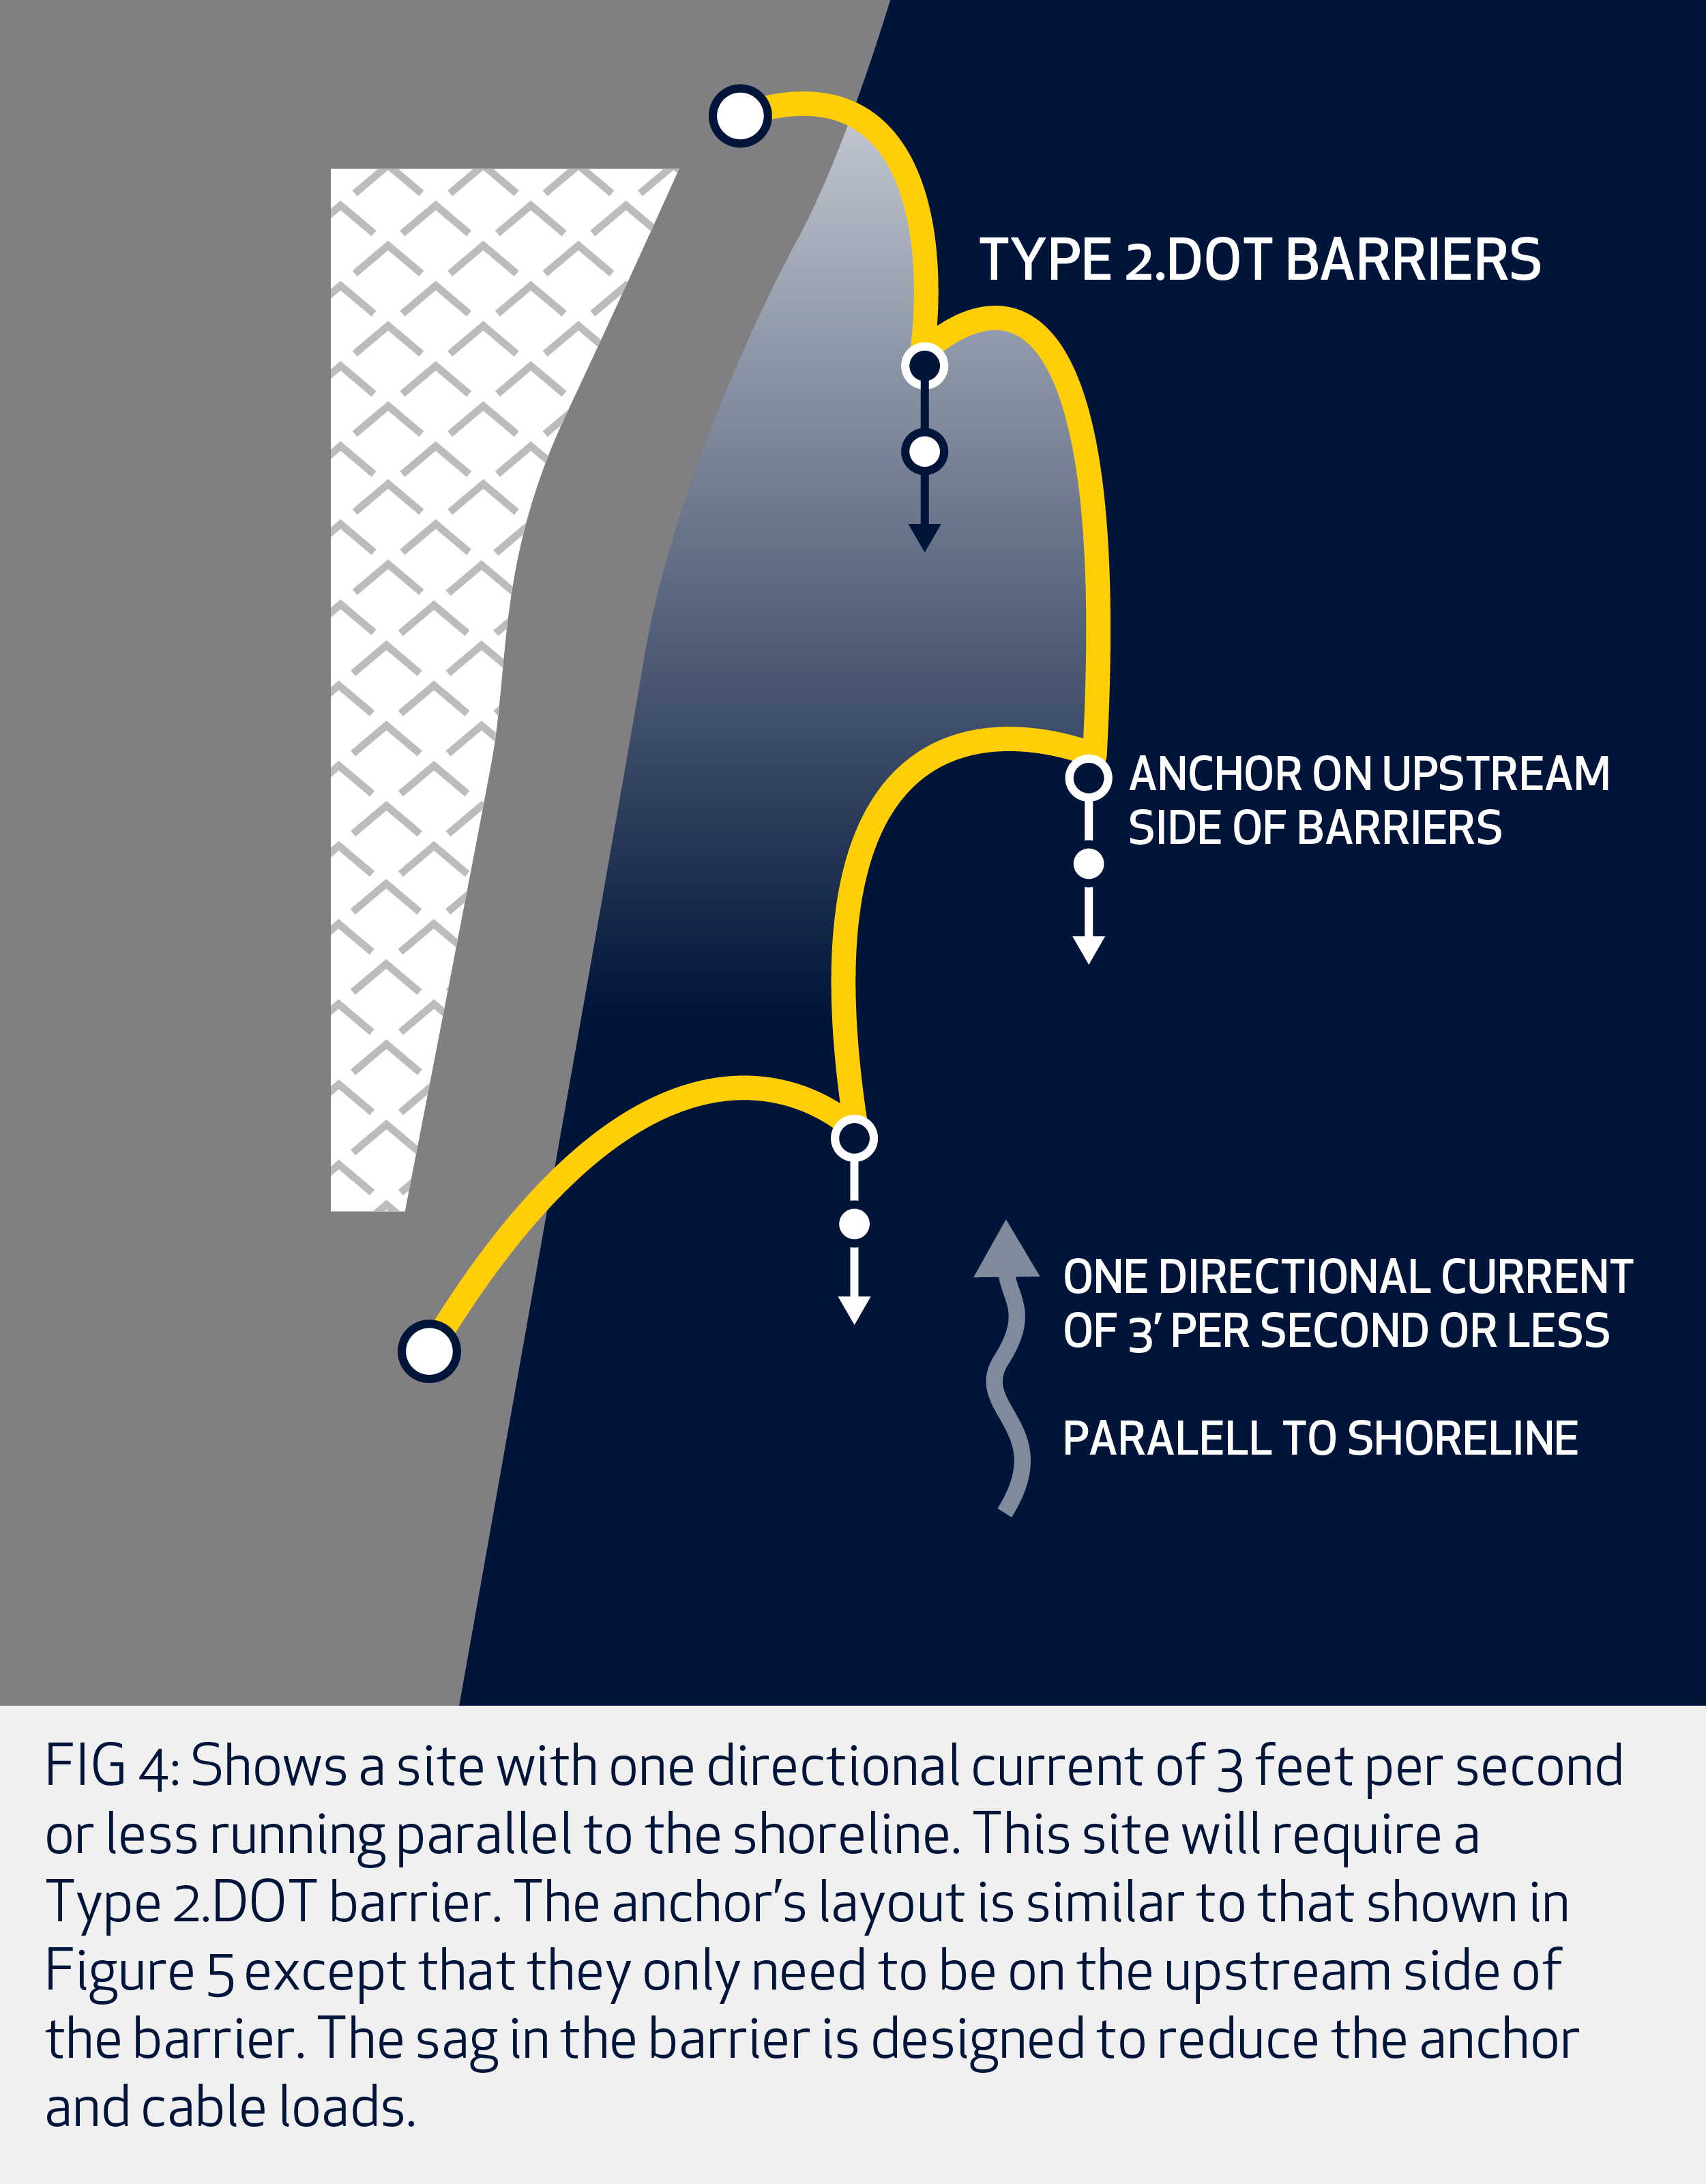
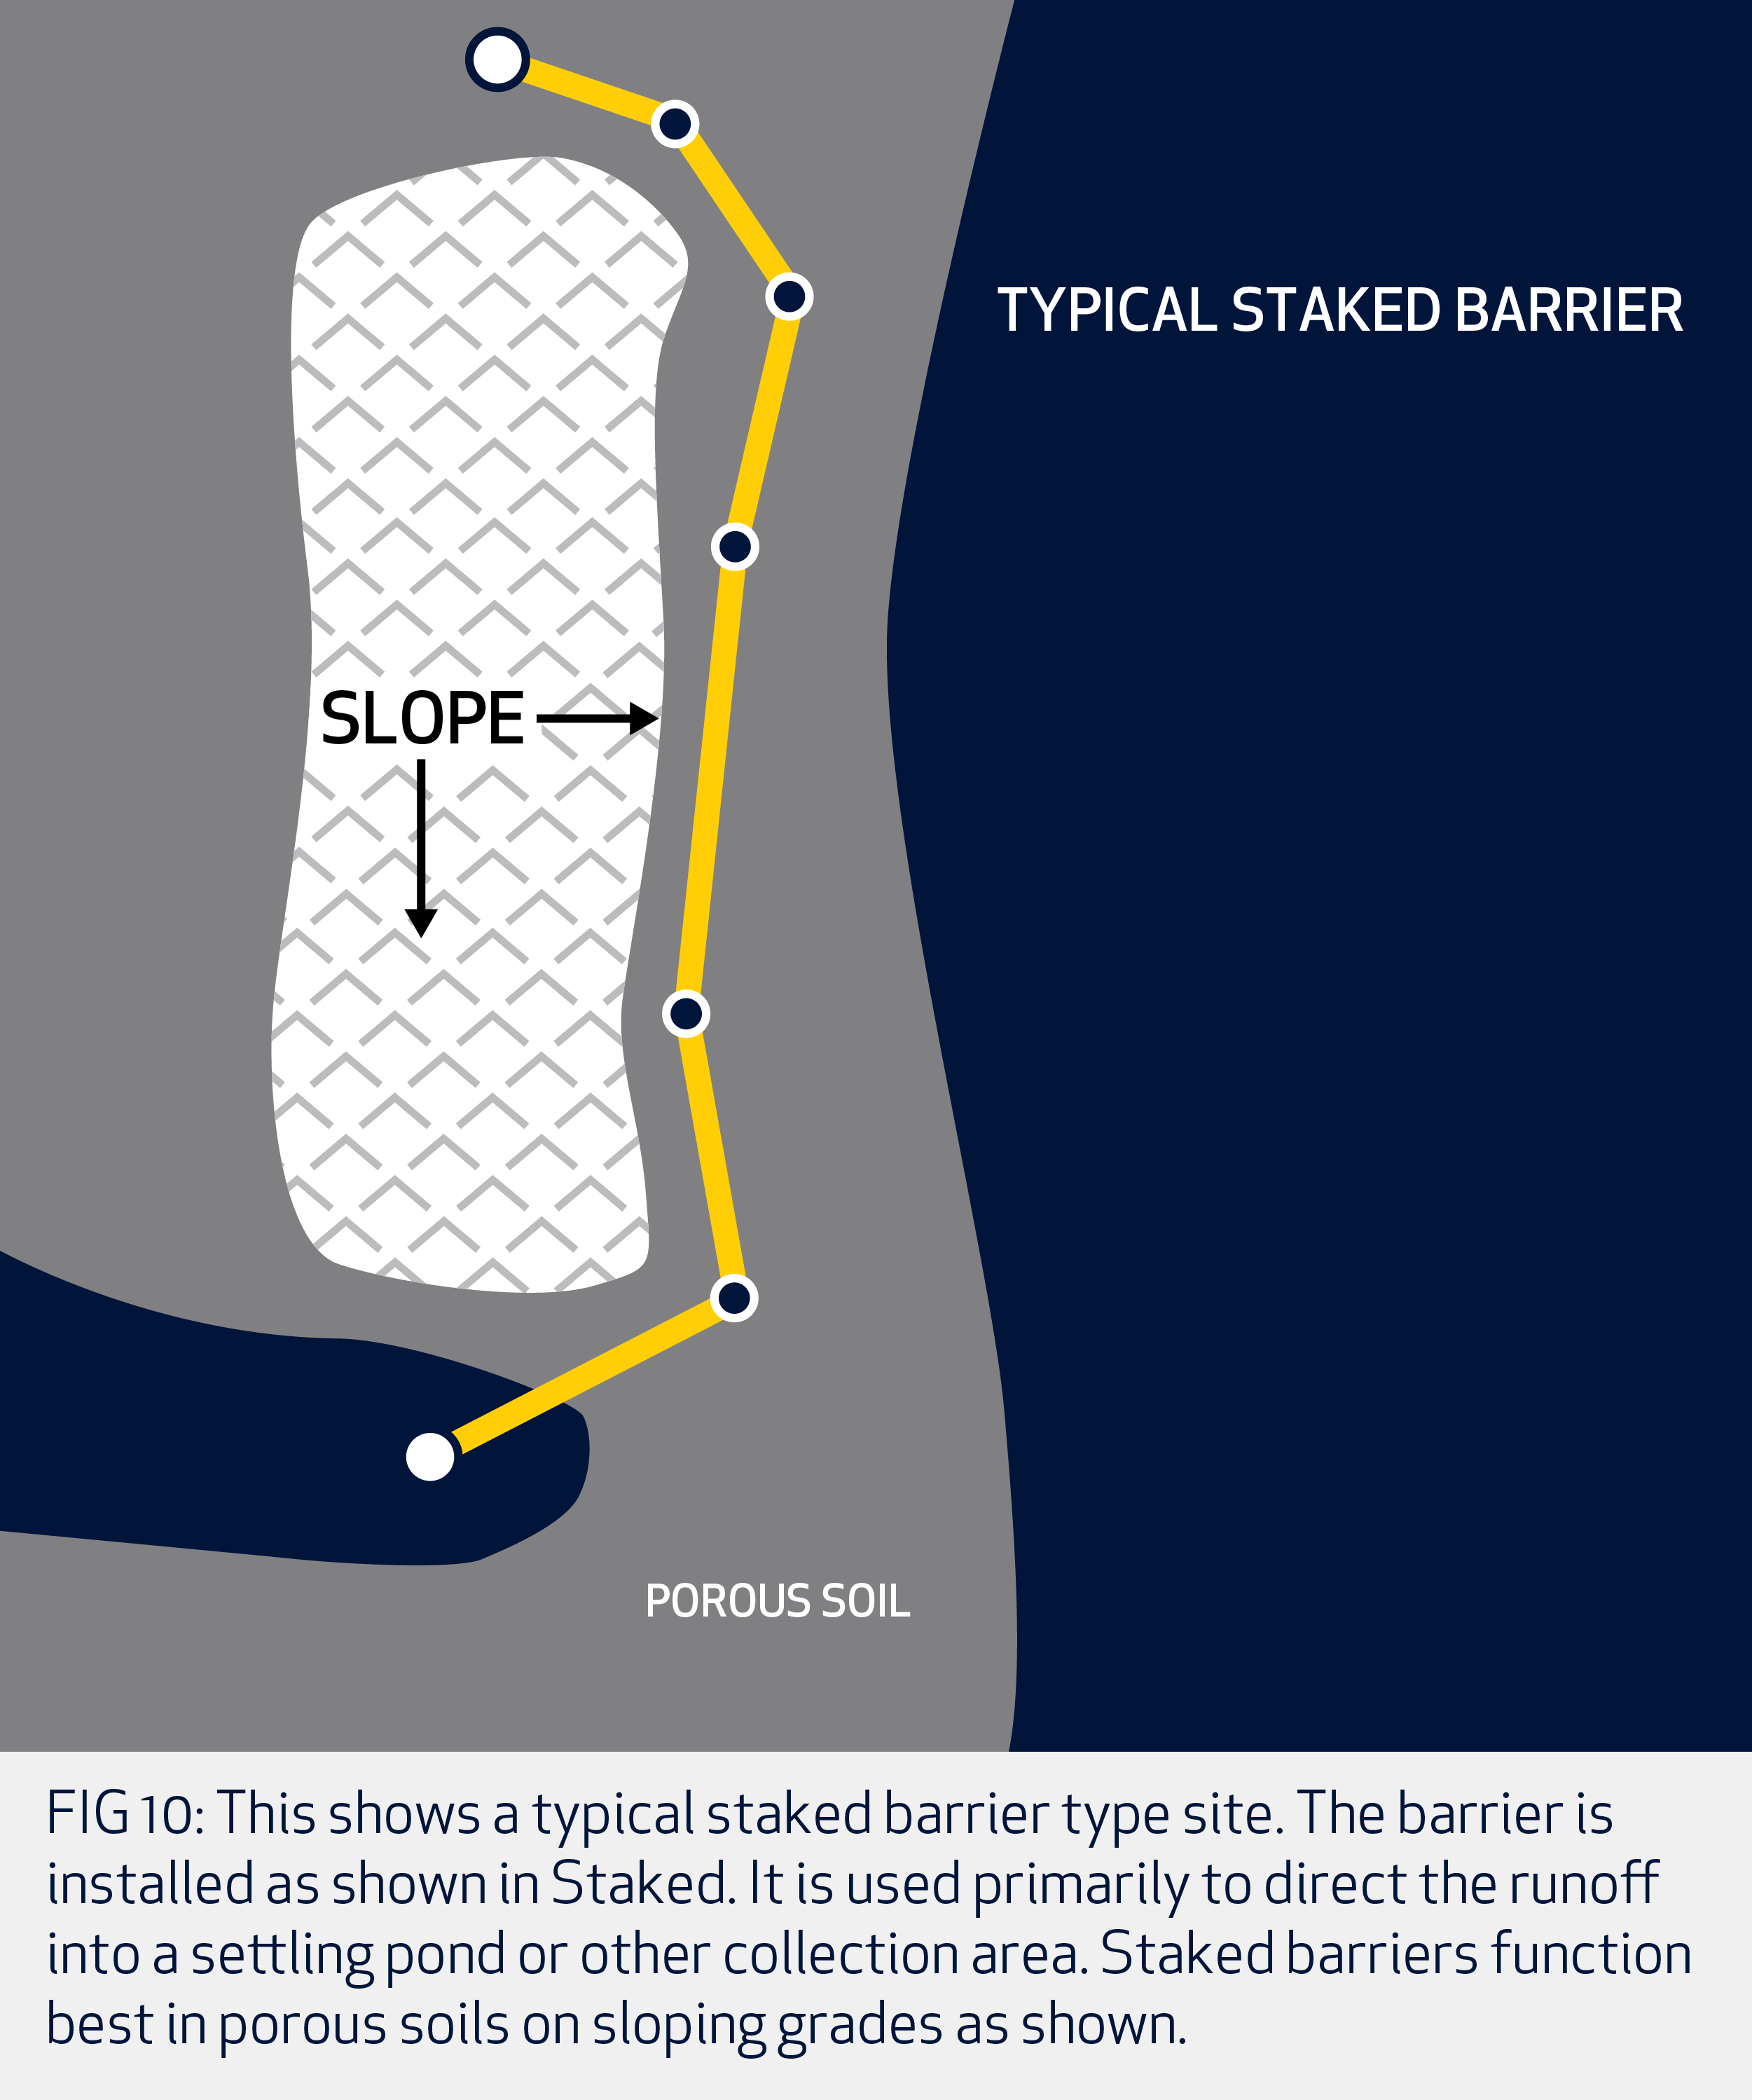
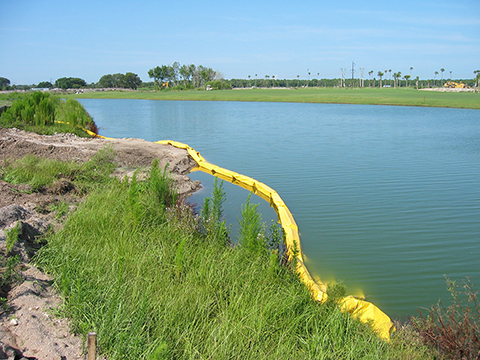
Floating turbidity barriers are effective in preventing silt and sediment migration into watercourses. However certain rules must be followed in order to make the installation successful.
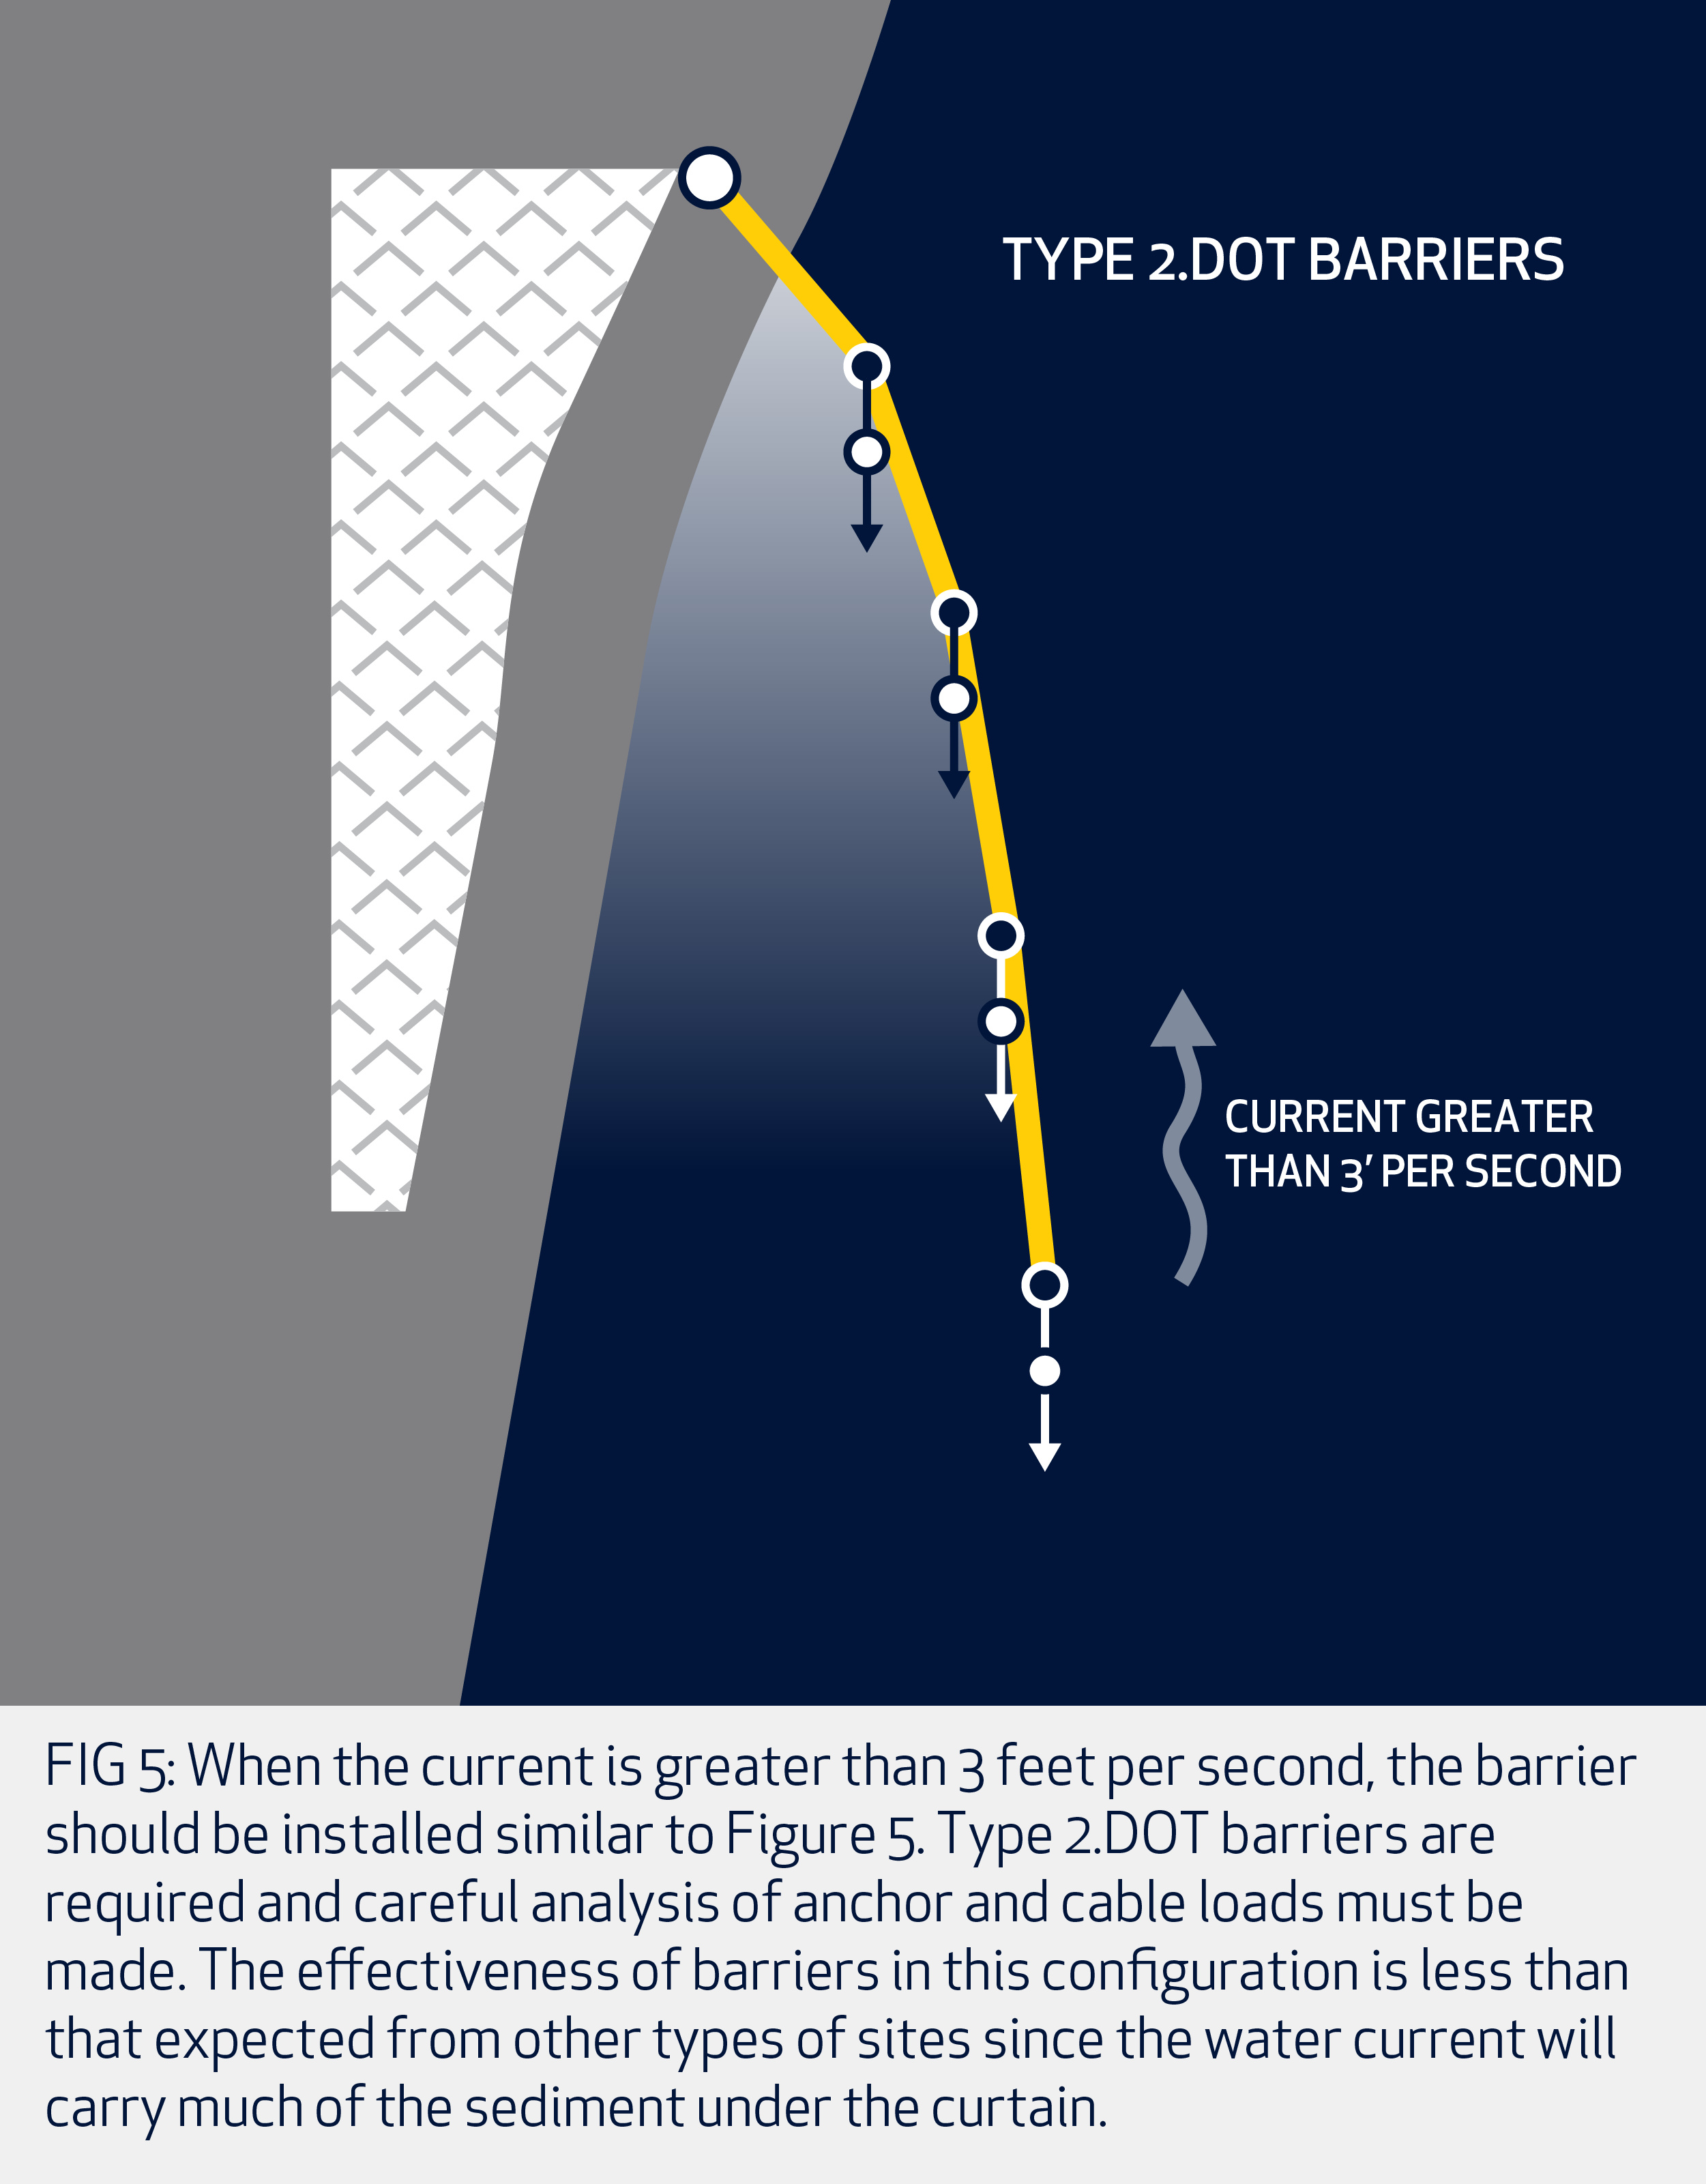
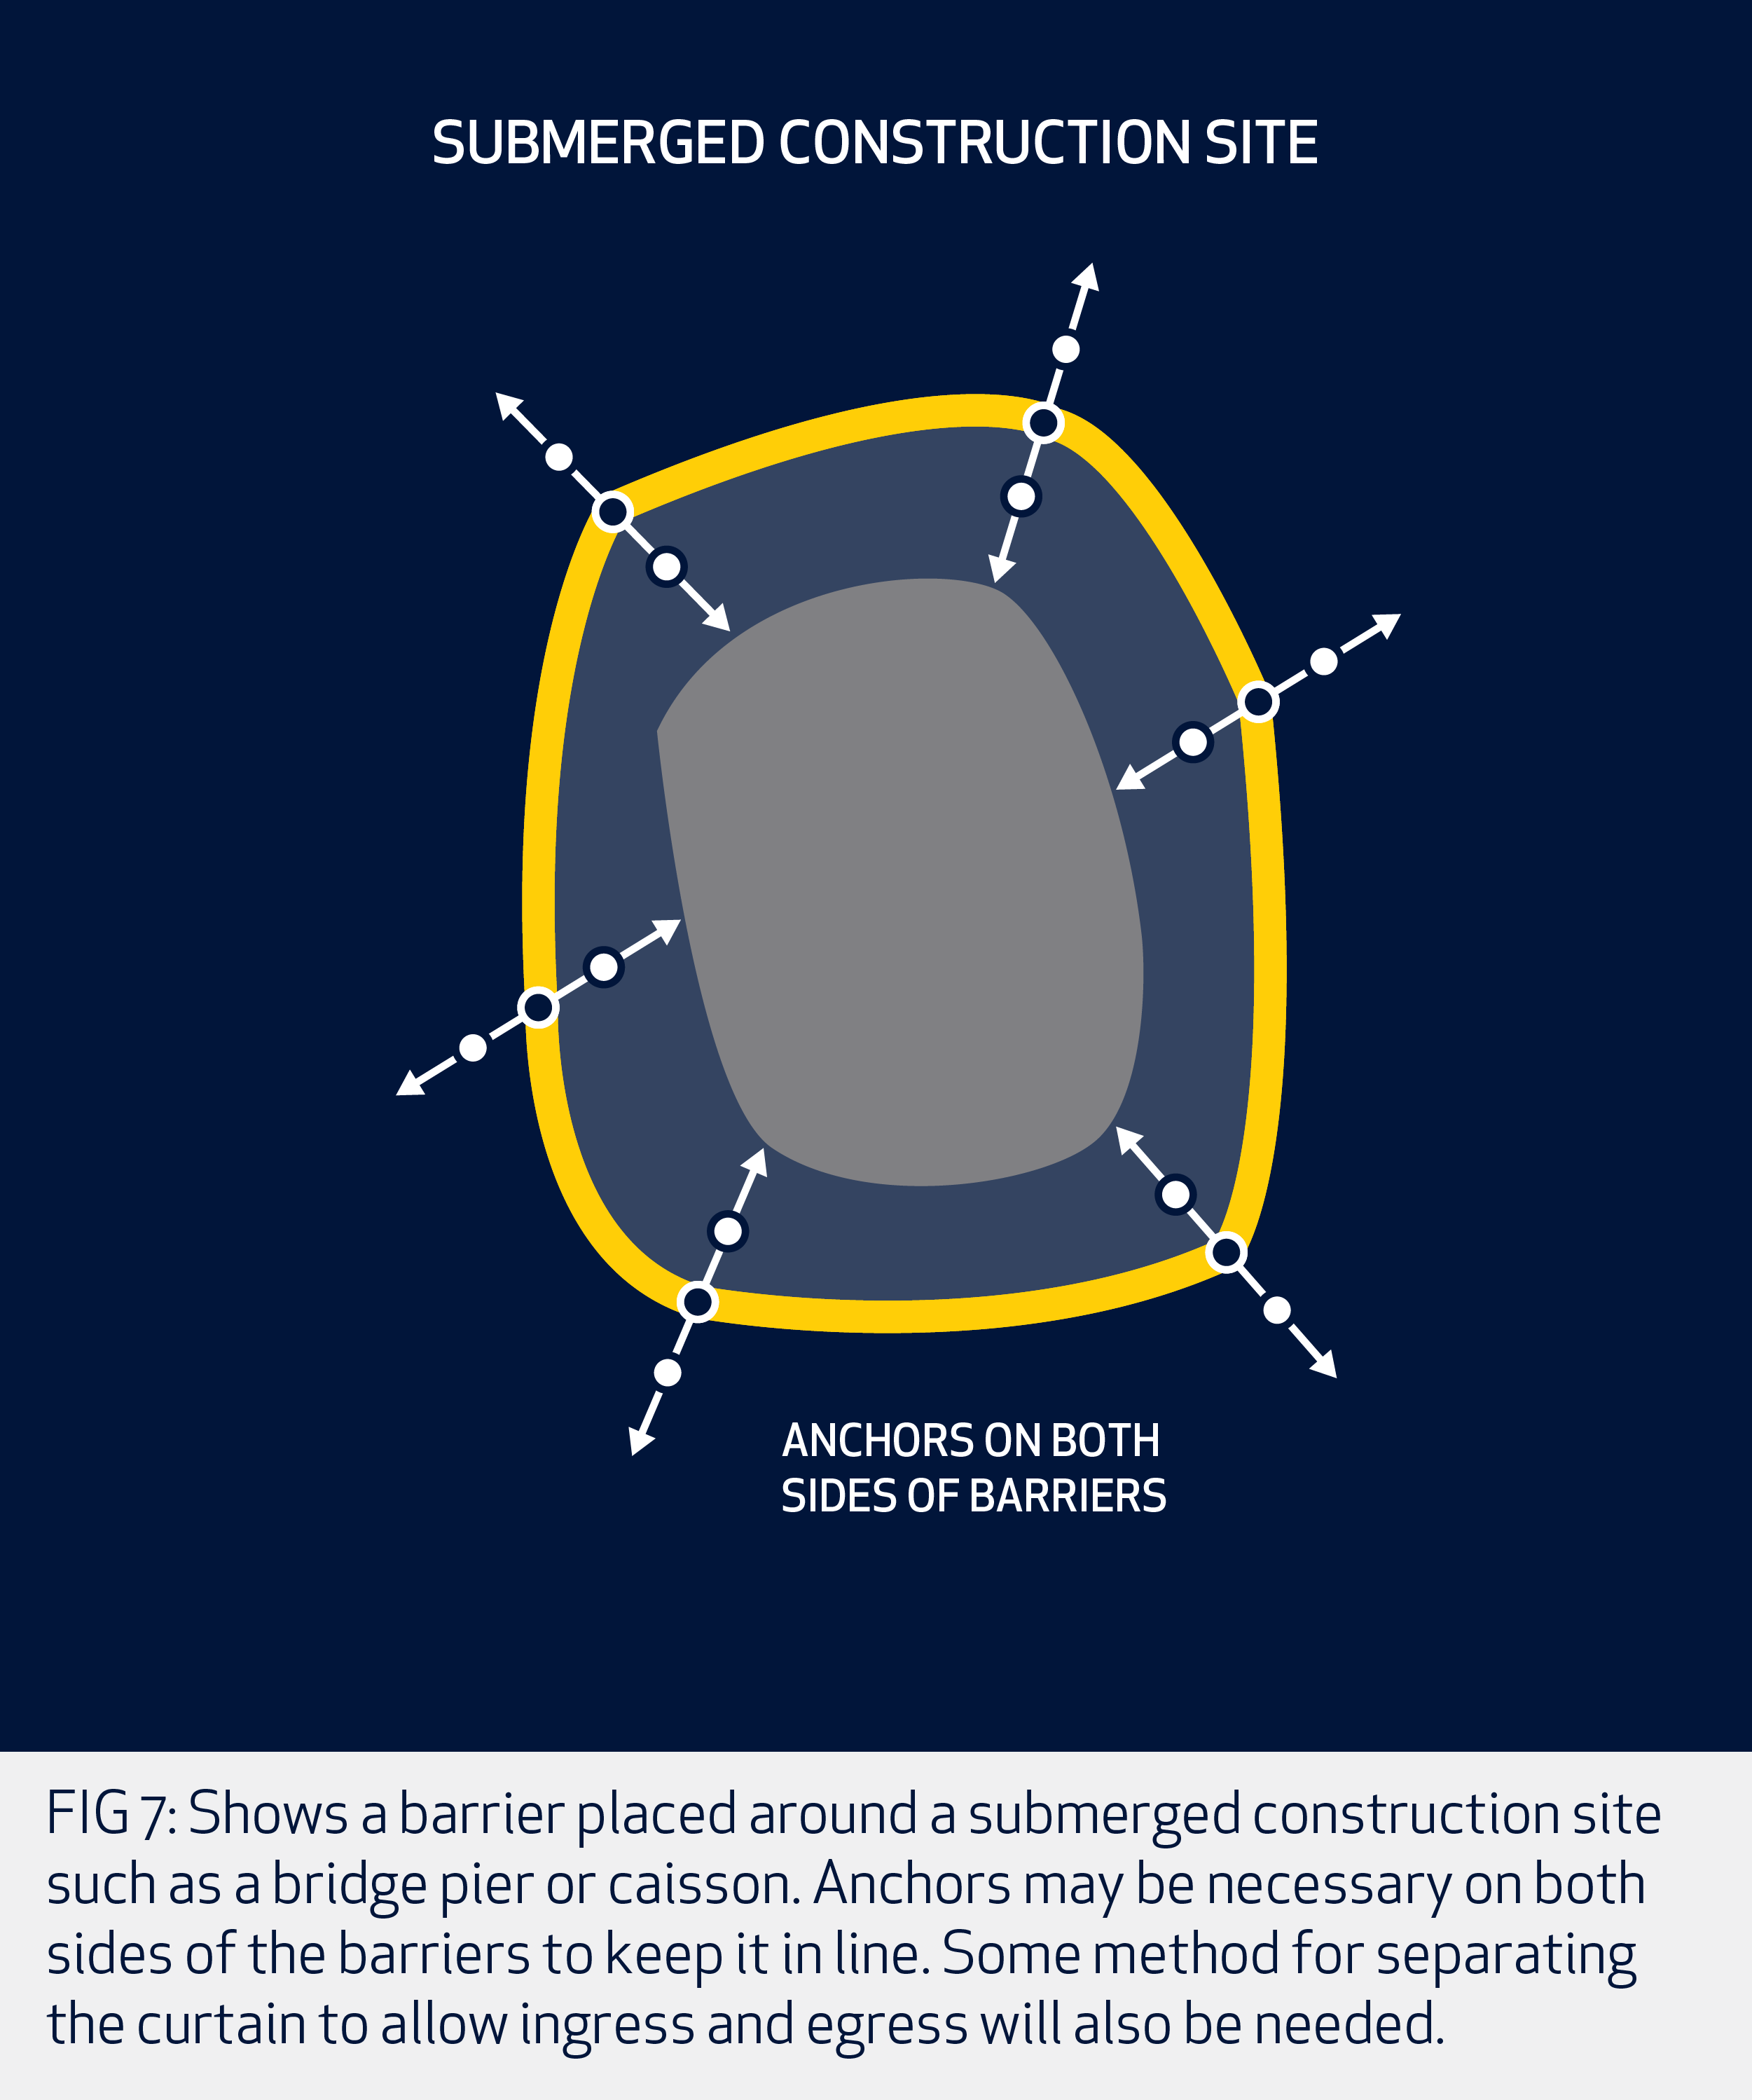
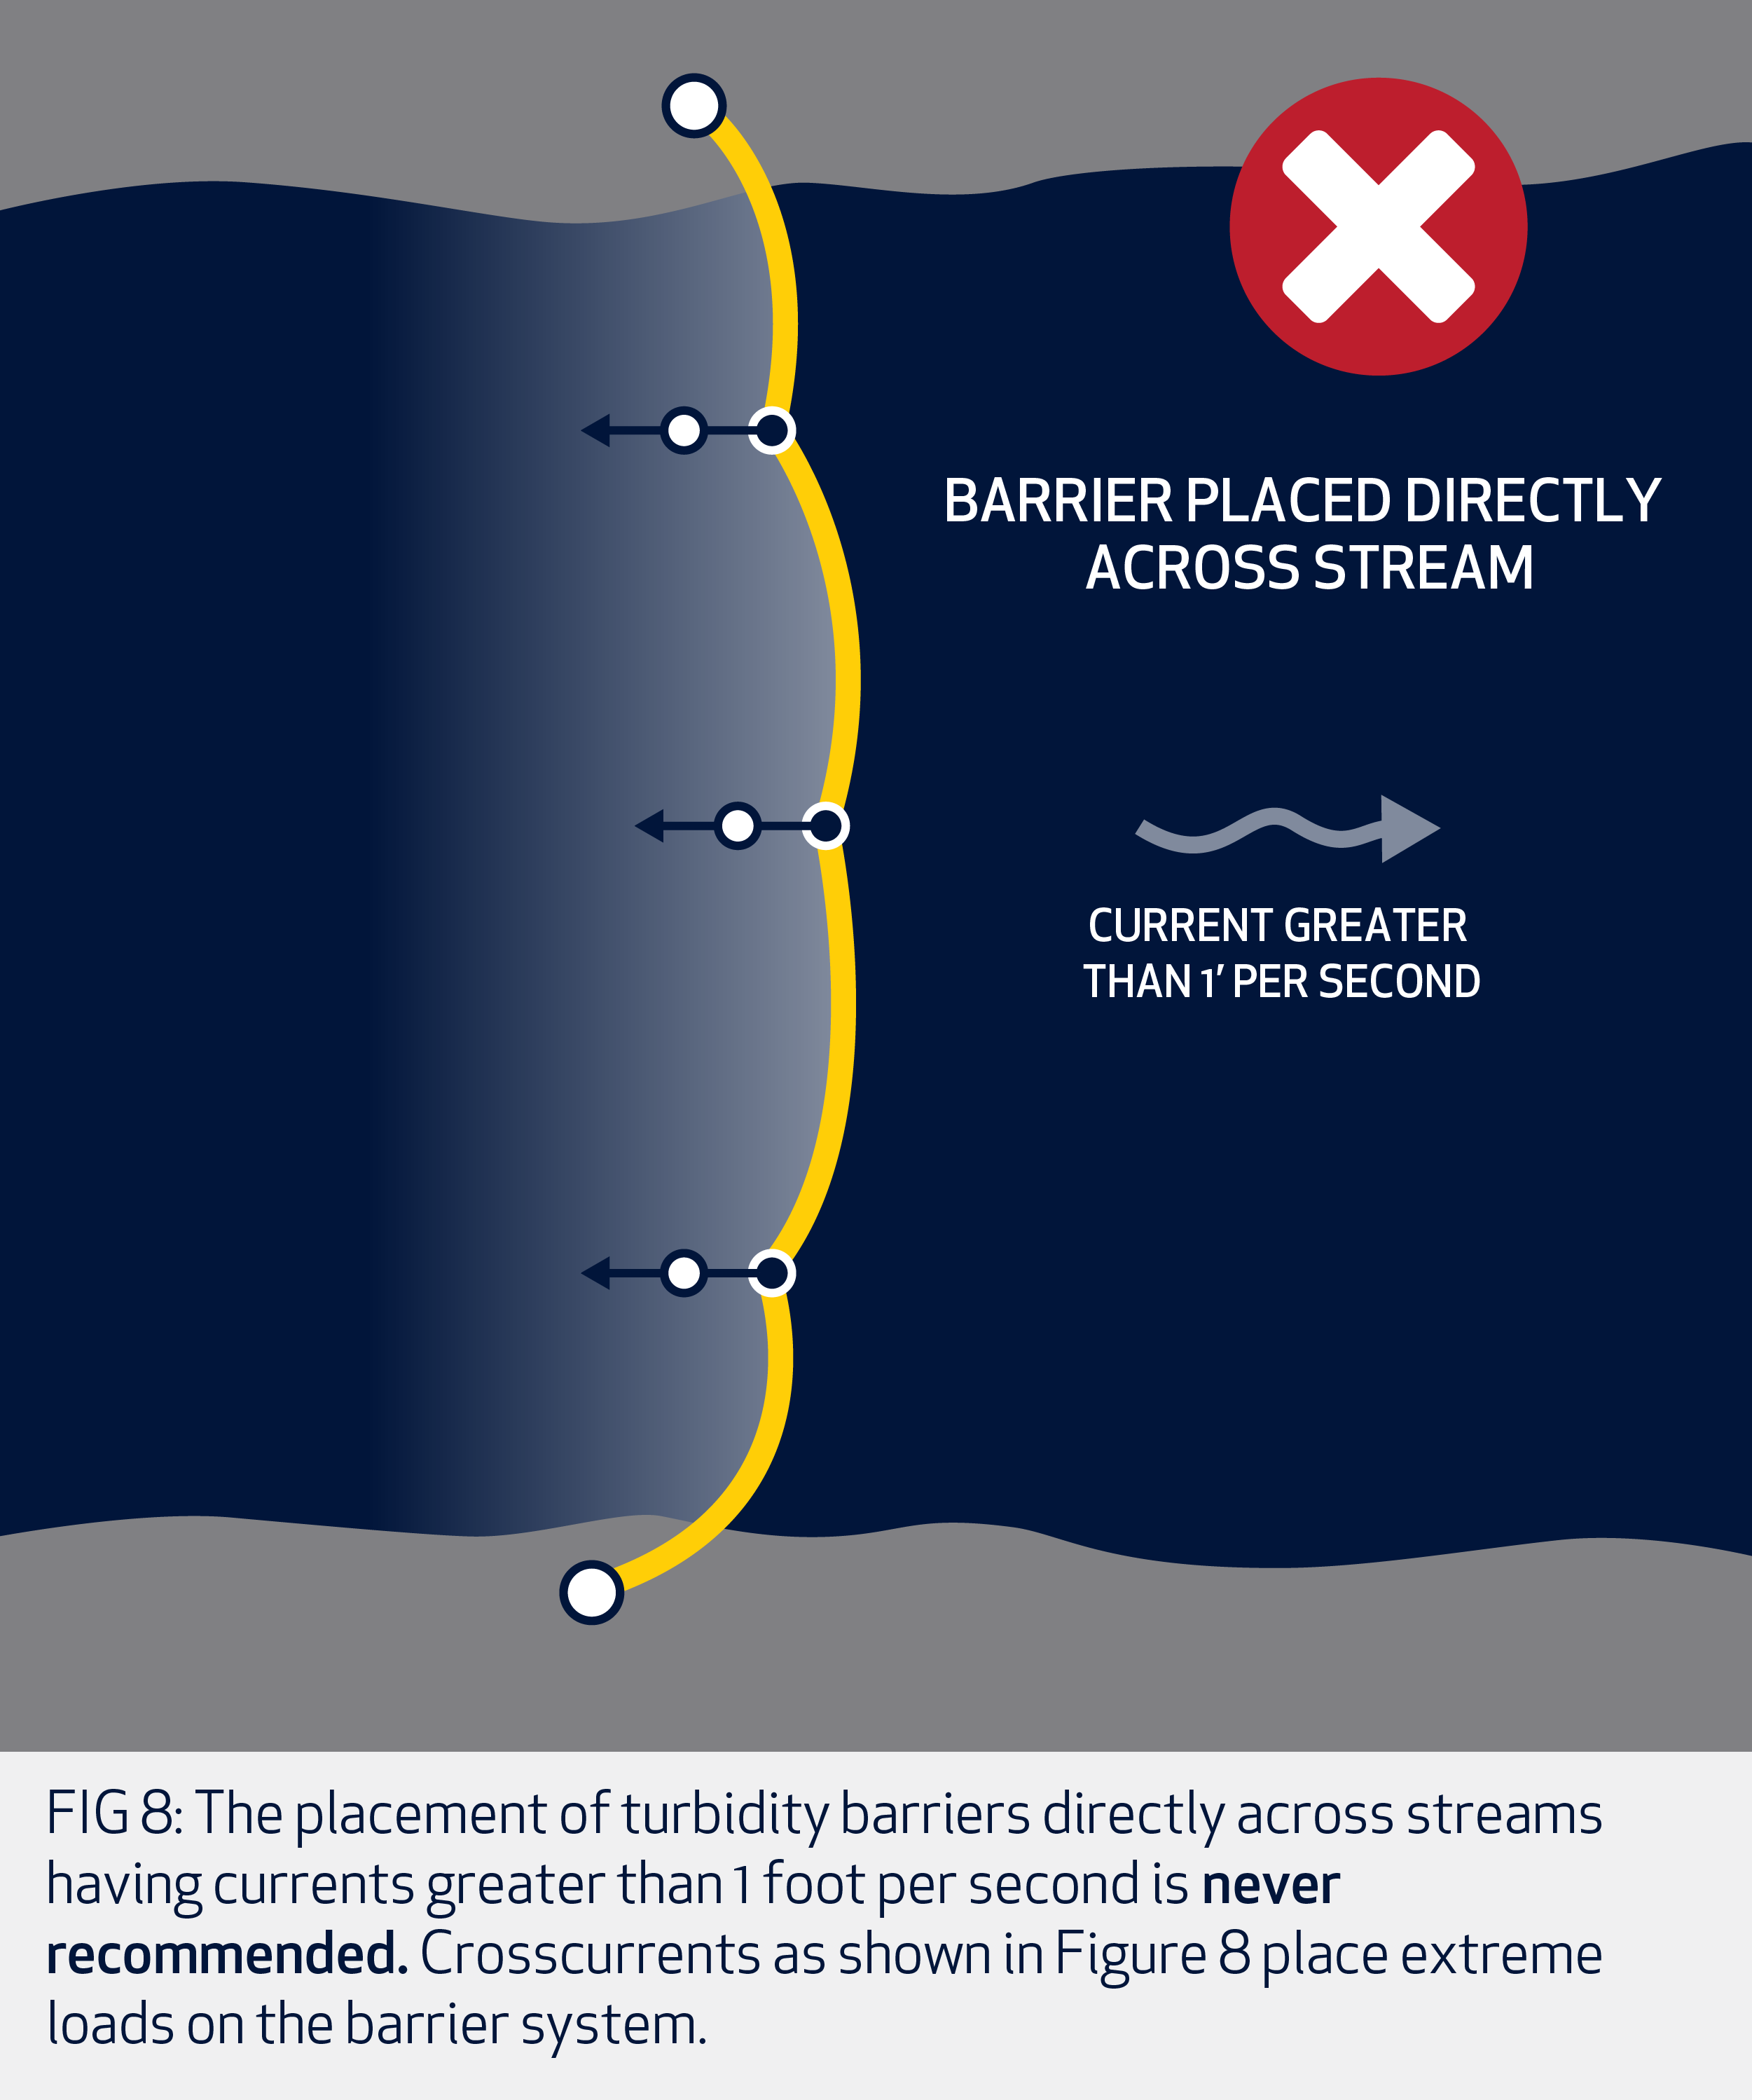
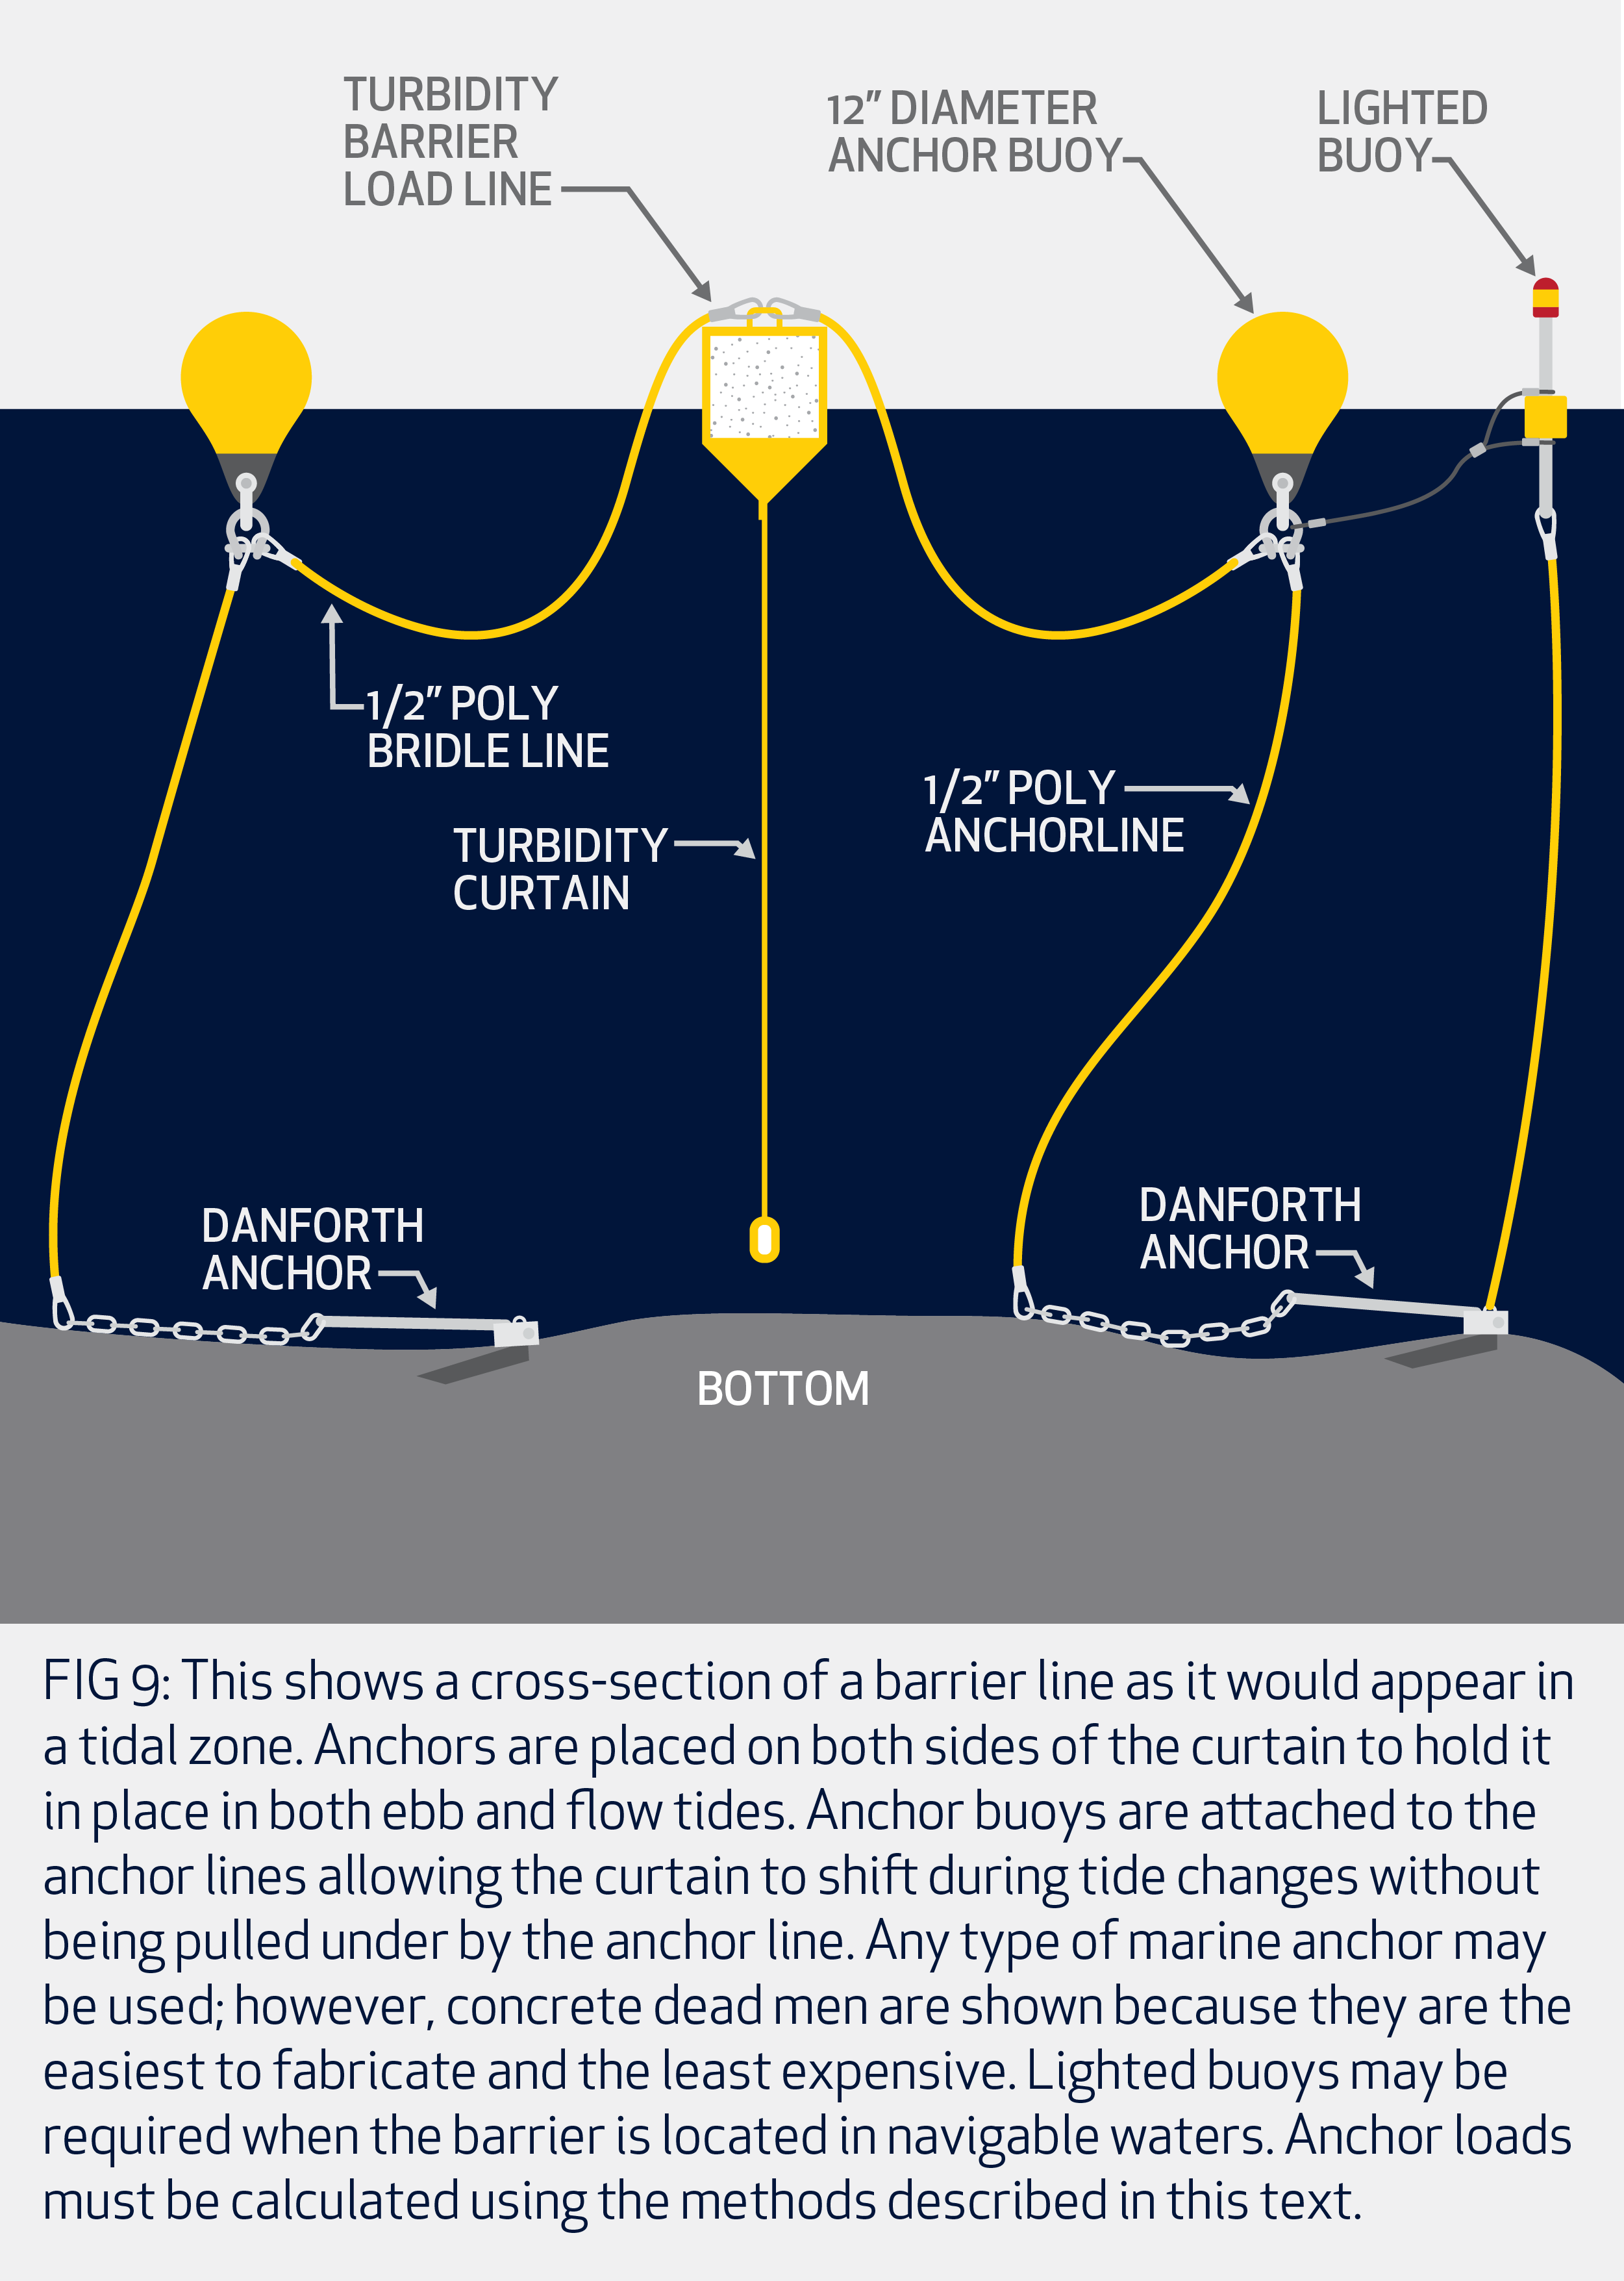
Please view our turbidity barrier installation illustrations below (click to enlarge), to use them as a general guide for your barrier installation, or CLICK HERE to read more instructional details.

“Aer-Flo is incredibly reliable. When they say they will take care of something, you know it will be done.”
— Texas Distributor —
“Aer-Flo is the go-to company for all environmentally sensitive projects.”
— Alabama Distributor —
“I’ve never had an issue with an order being fulfilled. They always get it done.”
— Florida Distributor —
“In today’s environment, getting products out to customers isn’t easy for some companies. But for Aer-Flo, this isn’t an issue. If they say they’ll get you the product, they do it.”
— Alabama Distributor —
“It is VERY easy to get a hold of someone at Aer-Flo and get questions answered and get real, live help with orders.”
— Florida Distributor —

 4455 18TH STREET EAST, BRADENTON, FL 34203
PH: 941.747.4151 FX: 941.747.2489